Monday, September 14, 2015

How to Start Selling Amazon FBA 
with YOUR PRIVATE label food products :


We started our online candy company several years ago , and when we did we knew we wanted to grow but looking at where we are today ....to be honest I get excited EVERYDAY I get up I know we grow everyday ! It can be the most exciting thing operating your own business, but it does in all honesty take a lot of effort and energy , and is the most rewarding thing you will start !
The thing that I have grown to love about operating my own business really is the growing of the business. When you start something from nothing but just an idea and it grows you LOVE to see it develop and become something bigger than it was than when it started !
Since becoming a Dad I see this same type of feeling in seeing my child grow and learn and becoming something bigger than he was the day before .....


So back to the Amazon FBA selling technique . We are still kind of "new" to FBA private label selling but we produce about 90 percent of the candy we sell. We do sell a few items that rae premade name brand candy/ snacks, but almost all our candy is hand made by us, and for that the FBA private label program was a perfect fit for us ! Since we started seeing many of the items we make sell well I wanted to share with others how to at least "start" the FBA food program . Selling your private label food through FBA is slightly different than selling standard products via FBA . The video below shows the starting point for you to get going ! I do hope this video helps and if you have any questions let us know ! We will be adding numerous videos for you as a FREE resource for your candy, food , edibles line of products ... GOOD LUCK 


How to start an Etsy Shop to sell YOUR hand made items !

We started our candy company at first from our home kitchen and with a little shop on ebay and etsy . Once we started making sales via Etsy we began to add more and more products and have had GREAT success on ETSY.com . We have shipped our delicious goodies to over 15 countries just through etsy, and with over 10,000 views a month on average we have grown by leaps and bounds through etsy only!! We ( also have several other selling platforms we operate stores on).....but that's for another blog post  so anyways we have filled thousands of orders and ship orders everyday.
We started a channel on YOUTUBE that has allowed us to offer short videos on numerous topics that face the beginning etsy seller or online offering hand made edibles ! I have included a couple videos that offer some great starter advice for the beginner ! many of the techniques and information we offer though can be used to apply to the selling of numerous products ( not just edible items ) ....If you have any questions let us know , also if you enjoy the videos like it!!! Thanks

How to Start Selling Online with your Baked Goods, Candies, and edible items!
 This Blog post will be a short video tutorial on how we can help!
We love sweets making them eating them and helping others build their brand ! Let us know what you think

This is one of over 90 videos we have to help sell your goodies online ! Let know what you think ! any questions ask us!!


How to make Chocolate Covered Pretzel Rods that will make guests at your next party wanting you to cater THEIR event!


Chocolate covered pretzels are a simple and fun and delicious way to make your aprty the event people remember and ( honestly there are a million ways to make these ) I will show you a couple here for the sake of not spending a ton of time on them ....
So you have heard of regular old fashioned chocolate on a pretzel yah yah yah everyone has tasted them , but what if you could flavor the chocolate ? color it? or even change the consistantcy of it? I am here to save the day with creative additions you can make to simply get everyones taste buds jumping OK let's get started .......


First Step:
 buy a bag of pretzel rodsyouc an pick these up at any grocery store and normally
get 16 - 18 rods per bag.


Also get a hand full of assorted ice cream topping sprinkles ! again these can be found pretty much at any grocer. You can use chopped nuts, Sprinkles, Small candies ( like skittles M&M candies etc)
Also pick up either Chocolate bricks or white chocolate bricks for melting we use a chocolate candy coating which is perfect for pretzel rod making ! Once you get all this home get all items open and ready to work with ! You will need a glass bowl roughly a quart size glass bowl ( now if you want to "color" the white chocolate you get the POWDER FOOD COLORING make suer it is NOT the liquid because it will not blend with the chocolate and ruin the chocolate . It has to be powder this can be found at a Michael's Craft or online ! Ebay amazon simply GOOGLE powder food coloring.

OK lets get started set out on parchment paper your pretzel rods and melt the white chocolate and reg chocolate ! I highly reccomend you start melting the chocolate in the microwave at 1 min intervals . and then 30 secomds this stuff can and will burn fast on you ! so watch it !


Once the white chocolate is melted stir to a thick consistency and then add the desired color and use a little powder at a time you wont need much once you have incorporated the coloring then you can add a little more at a time !

use a Spoon and coat the pretzel rod completely holding it at the tip ( end of the rod) tap it lightly on the bowl to get excess off! then lay it down o parchment. Allow to dry ( set up) or if you want to decorate it this ist the time to do it! coat it with anything and everything then allow to cool .
once you have them cooled and they are set for presentation you can individually wrap each one to give the pretzel a more personal gift fell to it! then present them on a table either inside a bowl or vase for a more classy look....
My next post I will talk about how to add a little flavor to the chocolate and create a taset unlike anything you have had with pretzel rods!

How to make Toasted Coconut in 3 easy Steps:
A delicious way to create a baked good topping, ice cream topping, or anything where you want to add some flavor with Toasted Coconut !! Don't over spend on pre made toasted coconut do it yourself and enjoy!


Step One : Buy a bag of sweetened Coconut flakes ( pretty much at any grocery store) you want to get the coconut that is sweetened because this adds to the flavor of the coconut after you have toasted it . The unsweetened coconut flakes have very little taste or flavor when they are toasted !
Traditionally the size of toasted coconut is in either a 7 oz bag or 14 oz bags. I use the 14 ounce bags because once you have it toasted you will have enough left over for a good amount of time. Depending on the amount you like to sprinkle on your dessert the 14 ounce will be plenty for several servings !

Step Two: Get a medium sized pan ( non stick) preferably because the sugars in the coconut will cook and stick to any pan other than a non stick !
Step Three: Toast Coconut in pan on a med to med high heat ( very important do not walk away ) for one moment with coconut . I say this because it can burn if you do not "move" the coconut around while toasting. Keep the coconut moving around looking for the flakes to begin browning. The whole process to toast really takes only about 5 - 7 minutes. Once all flakes look to be brown pour out onto a parchment sheet covered baking sheet to allow to cool !
Let cool for 30 -45 minutes and you can store in either a air tight container, or seal tight bag like a ziplock you don't have to refrigerate but it can stay at room temp for about 2 weeks. There is nothing raw with this so there should be nothing worry about with spoilage ( for about 2 weeks ) you can place in fridge about 1 month ! ( but once you try this on ice cream or baked goods, etc it won't last )
ENJOY !

Sunday, September 13, 2015

HOW TO MAKE AN AMAZING CAKE BALL EVERYONE 
WILL WANT WAY MORE THAN ONE 

So if you have ever wanted to make cake balls that will make your friends envious or wanting me well this post is for the cake ball lover and maker! if you are a beginner or a pro we have been making cake balls from scratch and in over 30 flavors and colors for years thousands upon thousands of cake balls so here it is ....
 These Lavender marbled cake balls in the picture will be the topic of this blog entry! I will walk you through how we make these and the easiest way for you to replicate them at home !

Step one : Choose  from what kind of cake you want Vanilla, Chocolate, Strawberry ( or any flavor you wish ). We make our cake from scratch using a recipe we have trusted for many years . If you do not have a cake recipe you can always use a box cake. This would be a Duncan Hines, Betty Crocker or any boxed cake baked and cooled!
Step Two: Once your cake has cooled completely crumble into a kitchen aid ( if you do not have a kitchen aid) you can use a hand held mixer and completely blend the cake to an almost powder like consistence. This is one way to create a soft and almost creamy cake ball that will make anyone want more!

Step Three: Once you have the cake blended and in a almost powder form you can blend half a container of frosting ( again if you have a brand you prefer you can use Duncan Hines, Betty Crocker etc) per 1 Pyrex pan of 9x12 you will use half a container of frosting .


Step Four: Once you have blend the frosting into the mix you should have a consistence like play doh a smooth dough like form ( this when coated with chocolate will be the most moist and soft cake ball you ever had).

Step Five: Scoop the cake ball using a med cookie scooper you want a cake ball that is bite size not to big or so tiny it cant be enjoyed in a couple bites! once scooped you should roll by hand and ensure it is a "round" shape not a egg or a square round cake balls coat well in chocolate and make for a great shape !

Step Six : Coating the cake ball with chocolate so ......these are going to be a marbled look and to achieve this it is a little tricky but not impossible ! take 2 colors of chocolate have them in 2 separate bowls. pour a table spoon of each color into 2 separate sides of the bowl NOT to mix just yet . place the cake ball into the bowl between the 2 lines and slowly turn the cake ball into the 2 colors and the pull out with a fork and tap the cake ball on the side of the bowl to get the excess off. place on a  piece of parchment paper to allow to set up . This point you need decorate before the chocolate sets , and allow at least 1 day to set .  
contact us if you have any questions or help with your decorating !


Friday, September 11, 2015

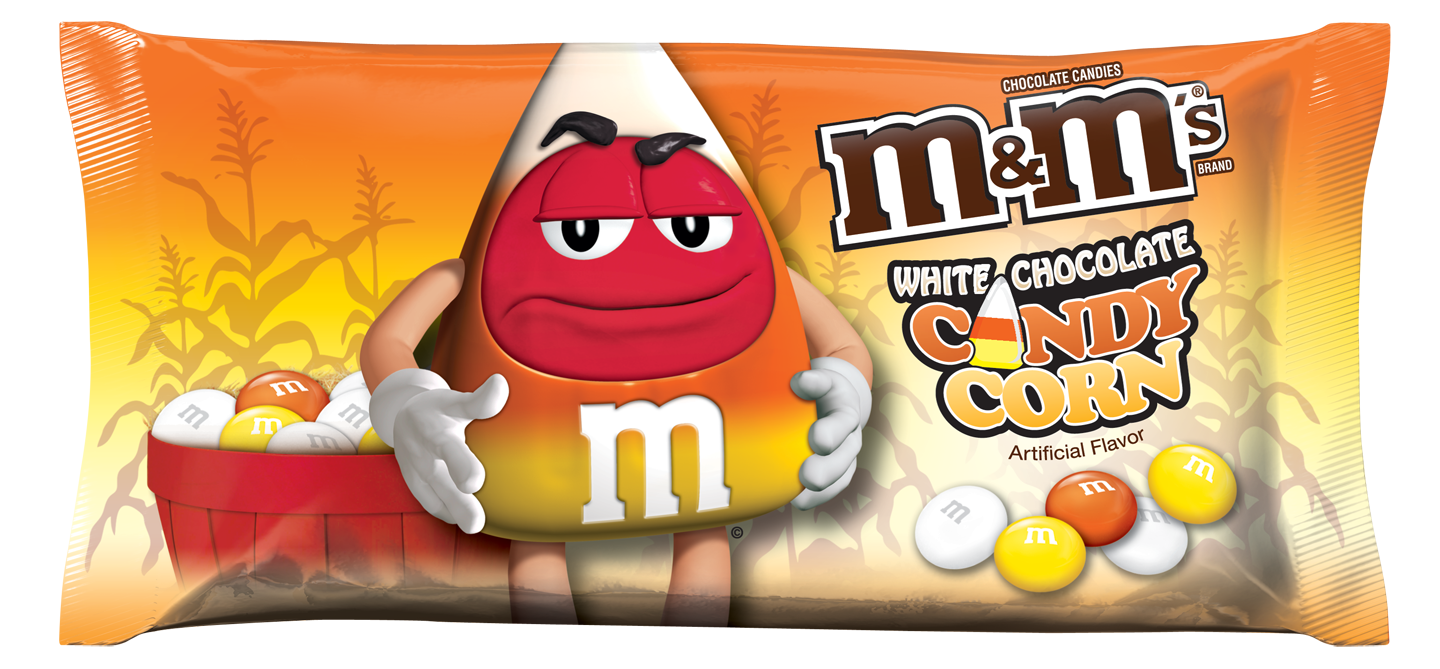
Candy Review No. 1 : M7M Candy Corn Fall classic flavor is almost exactly like a a candy corn and also has a white chocolate hint not to over bearing but very addicting.
If you have a love affair for candy and specifically candy corn and M&M these would be a great fit for your sweet tooth . Candy corn by itself is sometimes a bit to sweet and sugary taste. The great thing about them is the NOT so overly sugary flavor . Check out the next additions for holiday candies review . These can be picked up for $3.29 per bag at most grocers this is the average pricing for what we found !